Unraveling the Enigma: Resolving BullGuard’s Elusive bgsecerase.exe Errors
Introduction to bgsecerase.exe
The bgsecerase.exe file is a part of BullGuard Internet Security, a popular antivirus software developed by BullGuard Ltd. This file is responsible for the secure erase feature in the program. However, users may encounter errors related to bgsecerase.exe, such as runtime errors or EXE errors.
To troubleshoot these errors, follow these steps:
1. Make sure you have the latest version of BullGuard installed. You can download updates from the official BullGuard website.
2. Check if the bgsecerase.exe file is located in the correct installation path. The default path is usually “C:Program FilesBullGuardBullGuard Internet Security”.
3. Ensure that you have the necessary permissions to access and modify the file. Right-click on the file, go to “Properties”, and check the permissions tab.
4. If the error persists, try reinstalling BullGuard. Uninstall the program, download the latest version from the BullGuard website, and follow the installation instructions.
5. If none of the above steps work, contact BullGuard customer support for further assistance. They will be able to provide more specific troubleshooting steps based on your specific issue.
Is bgsecerase.exe safe for your computer?
bgsecerase.exe is a file associated with BullGuard Antivirus, developed by BullGuard Ltd. It is a secure erase utility that helps in removing files securely from your computer.
In most cases, bgsecerase.exe is safe for your computer. However, if you are experiencing runtime errors or encountering any issues with this file, there are a few troubleshooting steps you can follow to resolve them.
First, make sure that your BullGuard Antivirus is up to date. Updating the software can often fix any bugs or issues that may be causing the error.
If you are getting permission issues or encountering errors related to file paths, try running the application with administrative rights. Right-click on the bgsecerase.exe file and select “Run as administrator”.
If the problem persists, you can try reinstalling BullGuard Antivirus. This can help in resolving any corrupted files or configurations that may be causing the error.
If none of these steps work, it is recommended to contact the BullGuard support team for further assistance. They will be able to provide you with personalized guidance to resolve the issue.
Common errors associated with bgsecerase.exe
- Check for Malware Infections:
- Run a full system scan using a reliable antivirus program.
- If any malware is detected, follow the antivirus program’s instructions to remove it.
- Update BullGuard:
- Open BullGuard by double-clicking on its icon.
- Click on the “Settings” option.
- Select the “General” tab.
- Click on the “Check for updates” button.
- If updates are available, click on the “Update” button and follow the on-screen instructions to install them.
- Reinstall BullGuard:
- Press Windows Key + R to open the Run dialog box.
- Type “appwiz.cpl” and press Enter to open the Programs and Features window.
- Locate BullGuard in the list of installed programs and click on it.
- Click on the “Uninstall” button and follow the on-screen instructions to remove BullGuard.
- Download the latest version of BullGuard from the official website.
- Run the installer and follow the on-screen instructions to install BullGuard.
- Perform a Clean Boot:
- Press Windows Key + R to open the Run dialog box.
- Type “msconfig” and press Enter to open the System Configuration window.
- In the General tab, select the “Selective startup” option.
- Uncheck the “Load startup items” checkbox.

- Go to the “Services” tab and check the “Hide all Microsoft services” checkbox.
- Click on the “Disable all” button.
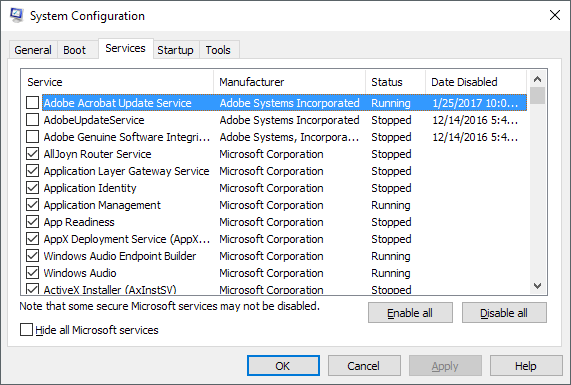
- Click on the “OK” button and restart your computer.
- Update Device Drivers:
- Press Windows Key + X and select “Device Manager” from the menu.
- Expand the categories to find the device drivers associated with BullGuard.
- Right-click on a device driver and select “Update driver.”
- Choose the option to search automatically for updated driver software.
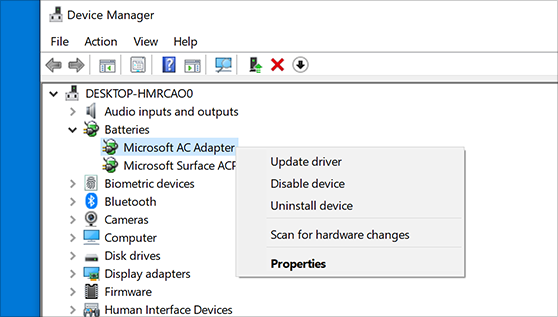
- If an updated driver is found, follow the on-screen instructions to install it.
- Repeat the process for other device drivers related to BullGuard.

How to repair bgsecerase.exe errors
If you are experiencing errors with the bgsecerase.exe file in BullGuard, follow these steps to troubleshoot and repair the issue:
1. Check file permissions: Ensure that you have the necessary rights to access and modify the file. This can be done by right-clicking on the bgsecerase.exe file, selecting “Properties,” and navigating to the “Security” tab.
2. Update BullGuard: Make sure you have the latest release of BullGuard installed. This can help resolve compatibility issues with your operating system.
3. Scan for malware: Run a thorough scan of your system using BullGuard or another trusted anti-virus software to check for any malicious programs or rootkits that may be causing the error.
4. Reinstall BullGuard: If the issue persists, try uninstalling and reinstalling BullGuard. This can help fix any corrupted files or installation path issues that may be causing the error.
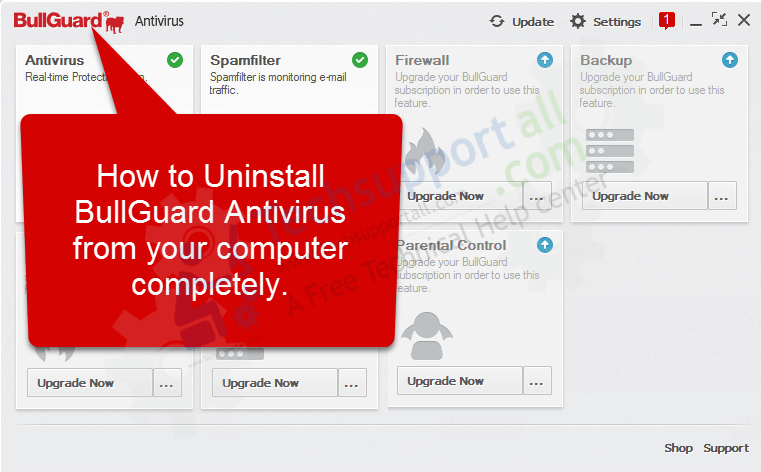
Uninstalling Bullguard antivirus and bgsecerase.exe
To uninstall BullGuard antivirus and bgsecerase.exe, follow these steps:
1. Open the Control Panel in your Windows operating system.
2. Navigate to the “Programs” or “Programs and Features” section.
3. Locate BullGuard antivirus in the list of installed programs.
4. Right-click on BullGuard and select “Uninstall” from the dropdown menu.
5. Follow the prompts to complete the uninstallation process.
6. Once BullGuard is uninstalled, locate the bgsecerase.exe file in your computer’s file system.
7. Right-click on bgsecerase.exe and select “Delete” to remove it from your system.
8. Empty your computer’s Recycle Bin to permanently delete the file.
Note: If you encounter any errors or permission issues during the uninstallation process, try running the uninstaller as an administrator. Additionally, make sure you have the latest version of BullGuard and that it is compatible with your Windows 10 operating system.
Manual removal of BullGuard Antivirus and bgsecerase.exe
To manually remove BullGuard Antivirus and bgsecerase.exe, follow these steps:
1. Close any open BullGuard or bgsecerase.exe processes in Task Manager.
2. Open the Control Panel and navigate to “Programs” or “Programs and Features”.
3. Locate BullGuard Antivirus in the list of installed programs and click “Uninstall” or “Remove”.
4. Follow the on-screen prompts to complete the uninstallation process.
5. After uninstalling BullGuard Antivirus, navigate to the software installation path (typically in the “Program Files” or “Program Files (x86)” folder).
6. Locate the bgsecerase.exe file and delete it.
7. If you encounter a permission issue while deleting the file, right-click on the file and select “Run as administrator”.
8. Empty the Recycle Bin to permanently delete the file.
9. Restart your computer to complete the removal process.
Note: These instructions are for manual removal and may vary depending on your Windows OS version and BullGuard product. If you’re unsure or encounter any issues, it’s recommended to seek assistance from BullGuard support or use a reliable uninstaller tool.