Welcome to the Basictbinstaller39.exe Troubleshooting Guide, your go-to resource for resolving any issues you may encounter with this essential software. Whether you’re a tech-savvy user or a beginner, this article will provide you with simple yet effective solutions to keep your system running smoothly. Let’s dive in and troubleshoot together!
Introduction to basictbinstaller39.exe
Basictbinstaller39.exe is a driver file that is used for installation on Windows computers. If you are experiencing issues with this file, here are some troubleshooting steps you can follow:
1. Check if the file is present in the correct location. The file should be located in the “C:WindowsSystem32” folder.
2. Verify that the file has the correct value. Right-click on the file and select “Properties.” In the “General” tab, check the “Version” and “Size” fields to ensure they match the expected values.
3. Make sure you have the necessary permissions to install the driver. If you are not a system administrator, contact your IT department for assistance.
4. Check if there are any software restrictions in place that may be preventing the installation. Open the Group Policy Editor by pressing the Windows key + R, typing “gpedit.msc,” and hitting Enter. Navigate to “Computer Configuration” > “Windows Settings” > “Security Settings” > “Software Restriction Policies.” Check if there are any policies enabled that could be blocking the installation.
5. If you encounter an error related to the “DisableMSI” registry key, you can try enabling it. Open the Registry Editor by pressing the Windows key + R, typing “regedit,” and hitting Enter. Navigate to “HKEY_LOCAL_MACHINESoftwarePoliciesMicrosoftWindowsInstaller.” Look for the “DisableMSI” key and change its value to 0.
Safety of basictbinstaller39.exe
The basictbinstaller39.exe is a driver file that is commonly used on Windows 10 computers. It is important to ensure the safety of this file and troubleshoot any issues that may arise. To do this, it is recommended to follow these steps:
1. Open the Local Computer Policy by typing “gpedit.msc” in the Run dialog box or through the Control Panel.
2. Navigate to Computer Configuration > Windows Components > Windows Installer.
3. Click on the “Enforcement” option under the Software Restriction Policies node.
4. Double-click on “Software Restriction Policies” to open the settings.
5. In the right pane, right-click and select “New Software Restriction Policies”.
6. Open the “Security Settings” and click on “Software Restriction Policies”.
7. Right-click on “Additional Rules” and select “New Path Rule”.
8. In the “Path” field, enter the path of the basictbinstaller39.exe file.
9. Select the appropriate security level for the file (either “Disallow” or “Unrestricted”).
10. Click “OK” to save the settings.
Common errors related to basictbinstaller39.exe
- Open the official website of the software or application that uses basictbinstaller39.exe.
- Search for the latest version of the software or application.

- Download the latest version of the software or application from a trusted source.
- Run the installer file and follow the on-screen instructions to update the software or application.
- Restart your computer to ensure the changes take effect.
Repair Method 2: Scan for Malware
- Open your preferred antivirus software.
- Update the antivirus definitions to ensure the latest protection.
- Perform a full system scan to detect any malware or viruses.
- If any malware or viruses are detected, follow the prompts to remove or quarantine them.
- Restart your computer to complete the removal process.
Repair Method 3: Restore from System Restore Point
- Open the Start menu and search for “System Restore.”
- Select “Create a restore point” from the search results.
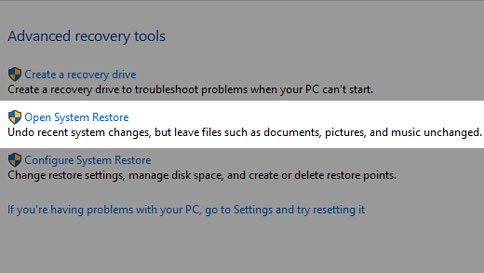
- In the System Protection tab, click on “System Restore.”
- Click “Next” and choose a restore point before the basictbinstaller39.exe error occurred.
- Follow the on-screen instructions to restore your system to the selected restore point.
- Wait for the process to complete and then restart your computer.
Repair Method 4: Reinstall the Software or Application
- Open the Control Panel from the Start menu.
- Click on “Programs” or “Programs and Features.”
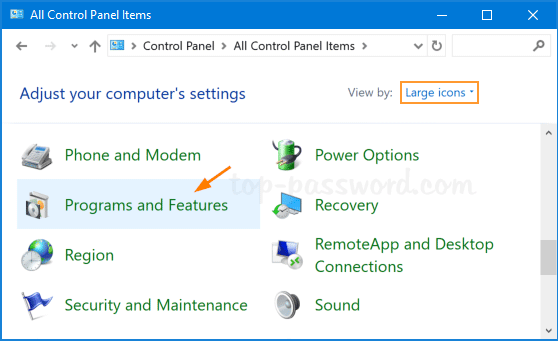
- Locate the software or application that uses basictbinstaller39.exe in the list of installed programs.
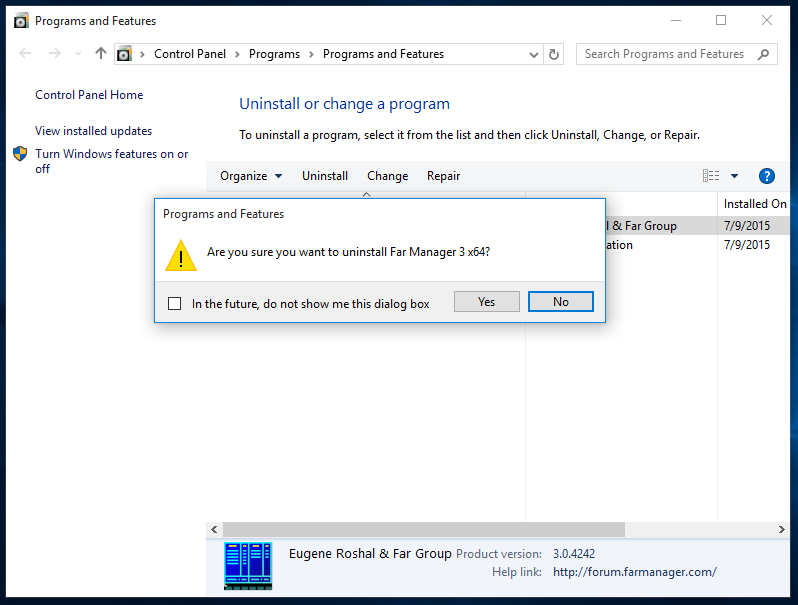
- Click on the software or application and select “Uninstall.”
- Follow the on-screen prompts to uninstall the software or application.
- Restart your computer.
- Visit the official website of the software or application and download the latest version.
- Run the installer file and follow the instructions to reinstall the software or application.
- Restart your computer again to complete the reinstallation process.
Repairing or removing basictbinstaller39.exe if necessary
If you encounter any issues with basictbinstaller39.exe, you may need to repair or remove the file. Here’s a troubleshooting guide to help you resolve the problem:
1. First, make sure you have administrative privileges on your Windows 10 system. If you don’t, contact your system administrator for assistance.
2. Open the Run dialog by pressing the Windows key + R on your keyboard.
3. Type “regedit” and hit Enter to open the Registry Editor.
4. Navigate to the following Registry path: HKLMSoftwarePoliciesMicrosoftWindowsInstallerServices
5. Look for the basictbinstaller39.exe entry and double-click on it.
6. In the Properties window, check the value in the “Data” field. If it’s set to “1”, change it to “0” to disable the file.
7. If you want to completely remove basictbinstaller39.exe, delete the entry from the Registry.
8. Restart your computer for the changes to take effect.
Remember to always exercise caution when modifying the Registry, as incorrect changes can cause system instability.
